 Mapping and understanding a user’s whole problem is a fundamental part of making sure you build the right services for users. Understanding the wider journey a user is on helps teams zoom out to the big picture and into the detail they are currently working on. A map is one of the most common ways that teams can do this.
There is no one definition of what a map is. However, most maps are a visual representation of the relationships between data or ideas. In service design, maps usually include reference to users or people and they tell a story.
Teams will often start by making a user journey map or an experience map. Maps can evolve over time and take many different formats, as this great blog post from the Ministry of Justice (MoJ) describes. Other disciplines, like delivery management, also use maps. Some other types of maps that we often use in government are screen flow diagrams, stakeholder maps, service blueprints and service landscapes.
There are lots of different ways to map a service, and lots of different types of maps you could make. But the most important thing to know is that there’s no one map you must make, one right way to map, or one best map template to use. The best advice is to just try mapping and see how it goes. It doesn’t cost much to try making a map and throw it away if it isn’t helpful. Many maps end up bringing a huge amount of value to a team, service or area of work.
Here are 5 steps to get you started with mapping. Making a map is (usually) an iterative process. Once you reach step 5 below, you might want to start again at step 1. Creating a map works best as a co-creation activity, although you can do it on your own.
Step 1: Work out what you want the map to do
Step 2: Get an idea of what you’d like the map to look like
Step 3: Gather the resources you’ll need to create a first draft of the map
Step 4: Create a first draft of the map
Step 5: Decide what to do next with the map

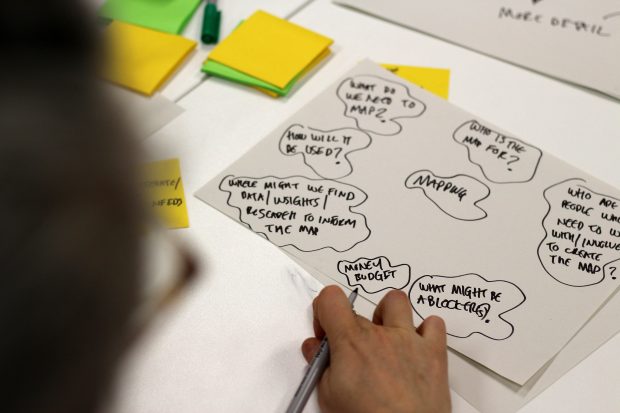
The photos in this blog post were taken at a 1-day service mapping practitioner-level training course run by Martin Jordan and myself. Thanks to all the attendees to that training course for all the insights and learning you shared with us, without which I could not have written this blog post.
Step 1: Work out what you want the map to do
Audience
Think about who you are making the map for. Some things you might consider are:
- Is it just for yourself?
- Is it for your team and wider organisation?
- Is it for a particular stakeholder?
- Is it for users or people outside your organisation?
- Is it for use in a series of workshops?
Your answers to this question might change later.
Purpose
Now work out what you want this map to do. Some questions might be:
- What do you want the audience to use it for?
- What message do you want them to take away from it?
- What do you want them to do differently after having interacted with the map?
- Do you want to map the current state or a possible future state?
- What data do you have that you’d like to include on the map?
While you’re working out what you want the map to do, you might need to revisit the audience. For example, you might realised that you want to use the map to get technical architects to explain the constraints of a system, so you’ll need to include those people in your audience.
Step 2: Get an idea of what you’d like the map to look like
Think about what kind of map would work for the audience and purpose you’ve identified in step 1. Some questions to consider:
- What information does it need to convey?
- What is the most important message you want people to remember from looking at the map?
- What data do you want to capture on the map?
- What mapping activity would best demonstrate your point?
You could draw a sketch of the map you’re imagining, or if you’re finding it hard to come up with ideas, ask colleagues or the cross-government design community for suggestions. Searching the internet or looking at books can also be a good source of inspiration.
There are lots of different ‘types’ of maps with specific names – try not to get too attached to particular types of maps or map templates. Decide what your map should look like based on your context, who the map is for and what you want it to do.
Again, it’s very common for what a map looks like to change over time as it evolves.
Think about what zoom level your map should be at – do you need a high level overview for people who are thinking strategically, do you want to connect people into the details of how something works front to back, or does your map need to allow people to zoom in and zoom out between different levels?

Step 3: Gather the resources you’ll need to create a first draft of the map
Physical and digital resources
This could include booking rooms, inviting the right people, securing the wall space, and/or preparing the online tools. You’ll need to think about how big the map might be or what shape it might take.
If you’re making a map with other people in a physical space, you might need big pieces of paper (a roll of paper can be very useful), post-it notes, marker pens, masking tape and stickers. If you’re making a map for yourself, by yourself, it might mean finding a pencil and a scrap of paper. If you’re making a digital map, you need to choose what tool to use and make sure you have the license and access you need.
Data
Collect the data that you’ll need to put on the map. This might mean doing some primary research or desk research yourself, or asking colleagues to bring or share existing data.
The mapping activity
If you’re going to be creating the map collaboratively with a group of people you will need to create some materials to use with the group. You might need:
- A presentation, posters, or a script to guide the activity
- Something to help you explain what you’re doing and how and why it’s relevant for the participants
- Instructions on how to fill in a template you’ve prepared
- A print-out of the data to use when the map is being created
Step 4: Create a first draft of the map
You might do this by yourself, with 1-2 colleagues or with a workshop of 15 people - it depends on your context. Just jump in and start, you can always iterate it or throw it away and try again.
Step 5: Decide what to do next with the map
You should revisit the audience and purpose you decided on step 1 – are these still right or has the process of drafting the map changed how you’re thinking about it?
These are some of the things you might decide to do next with your map.
Collect more data for the map
You could:
- gather more data because you’ve identified gaps in your map
- book another workshop because you ran out of time
- book another workshop because you want to engage more or different people
Create a new version of the map for a different audience
Be careful with this, because a lot of time can be lost to polishing a map. Make sure you know why and who you are doing this for. Beware of getting so attached to the map that it can’t be iterated or used. Beware of changing it into a format that can no longer be edited by other people. You could:
- create a higher fidelity version of the map
- create a digital version of the map so it can be shared
- create a simplified version of the map (for example, a small slice of it or a more visual representation of it) for consumption by a particular audience or group of stakeholders
Stop using the map
This is a good option that should always be considered. All maps reach the end of their usefulness at some point, and many maps are maintained beyond this point because people are attached to them or the process around them. You could:
- completely change the type or format of the map because you’ve realised there’s a better way
- decide to retire the map because it’s served its purpose or it didn’t work
That’s it! Get mapping! And let us know how you go in the comments or on the #servicedesign channel of the cross-government Slack.